Pin It
Ingredients
Showing posts with label Water. Show all posts
Tuesday, September 28, 2010
Friday, July 30, 2010
No-Knead Sourdough Bread
Pin It
1 ½ lb. loaf
3 cups all-purpose flour, more for dusting
¼ tsp. instant yeast
1 tsp. salt
1 tsp. sugar
1 c. sourdough
Cornmeal as needed
1. In a large bowl combine flour, yeast and salt. Add 1 5/5 cups warm water, and stir until blended; dough will be shaggy and sticky. Cover bowl with plastic wrap. Let dough rest for 18 to 24 hours at warm room temperature, about 70 ° F. You can put it into the oven with the oven light on.
2. Dough is ready when its surface is dotted with bubbles. Lightly flour a work surface and place dough on it; sprinkle it with a little more flour and fold it over on itself once or twice. Cover loosely with plastic wrap and let rest about 15 minutes.
3. Using just enough flour to keep dough from sticking to work surface or to your fingers gently and quickly shape dough into a ball. Generously coat a cotton towel with flour, wheat bran, or cornmeal; put dough seam side down on towel and dust with more flour, bran or cornmeal. Cover with another cotton towel and let rise for about 2 hours. When it is ready, dough will be more than double in size and will not readily spring back when poked with a finger.
4. At least a half-hour before dough is ready, heat oven to 450° F. Put a 6 to 8 quart heavy covered pot (cast iron, enamel, Pyrex or ceramic) in oven as it heats. When dough is ready, carefully remove pot from oven. Slide your hand under towel and turn dough over into pot, seam side up; it may look like a mess, but that is ok. Shake pan once or twice if dough unevenly distributed; it will straighten out as it bakes. Cover with lid and bake for 30 minutes, then remove lid and bake another 15 to 30 minutes, until loaf is beautifully browned. Cool on a rack.
by Mechele Eckman
www.basicliving.com
www.survivalsuperstore.com
3 cups all-purpose flour, more for dusting
¼ tsp. instant yeast
1 tsp. salt
1 tsp. sugar
1 c. sourdough
Cornmeal as needed
1. In a large bowl combine flour, yeast and salt. Add 1 5/5 cups warm water, and stir until blended; dough will be shaggy and sticky. Cover bowl with plastic wrap. Let dough rest for 18 to 24 hours at warm room temperature, about 70 ° F. You can put it into the oven with the oven light on.
2. Dough is ready when its surface is dotted with bubbles. Lightly flour a work surface and place dough on it; sprinkle it with a little more flour and fold it over on itself once or twice. Cover loosely with plastic wrap and let rest about 15 minutes.
3. Using just enough flour to keep dough from sticking to work surface or to your fingers gently and quickly shape dough into a ball. Generously coat a cotton towel with flour, wheat bran, or cornmeal; put dough seam side down on towel and dust with more flour, bran or cornmeal. Cover with another cotton towel and let rise for about 2 hours. When it is ready, dough will be more than double in size and will not readily spring back when poked with a finger.
4. At least a half-hour before dough is ready, heat oven to 450° F. Put a 6 to 8 quart heavy covered pot (cast iron, enamel, Pyrex or ceramic) in oven as it heats. When dough is ready, carefully remove pot from oven. Slide your hand under towel and turn dough over into pot, seam side up; it may look like a mess, but that is ok. Shake pan once or twice if dough unevenly distributed; it will straighten out as it bakes. Cover with lid and bake for 30 minutes, then remove lid and bake another 15 to 30 minutes, until loaf is beautifully browned. Cool on a rack.
by Mechele Eckman
www.basicliving.com
www.survivalsuperstore.com
Related articles by Zemanta
- How to make flat bread (plentyonyourplate.com)
- Garlic Monkey Bread (notecook.com)
- Recipe: Pizza Dough with Sourdough Starter (nytimes.com)
- Cheddar and chive sourdough recipe (telegraph.co.uk)
Thursday, July 29, 2010
Lexan Bottle - safe, durable water container
Pin It
Have you ever seen someone drop a gallon jug on the floor? The container ruptured, content spilling without reservation, and the owner watching helplessly. Storing or transporting liquid could be a challenge sometimes.
In a survival or an emergency situation, water is one of the single most important thing that could make or break your survival. It is important that you find access to safe, drinkable water. Once you gained access to drinkable water and your next objective is to keep it safe, the 1000ml lexan bottle is the perfect item for you. Made with Lexan Resin Polycarbonate Plastic, the lexan bottle is virtually indestructable. It also prevents absorbing flavors and smells, while the lid threads attach directly to MSR or Katadyn water filters for easy filtering. Graduated measures help you measure in both ounces and milliliters.
Used with water purification tablets, the 1000ml lexan bottle provides an easy solution to both obtaining and storing your safe, drinkable water. Does your 72 hour kit have a lexan bottle in it? If not, now is a great time to improve your kit by including one!
Click here for survivalsuperstore.com's product page.
In a survival or an emergency situation, water is one of the single most important thing that could make or break your survival. It is important that you find access to safe, drinkable water. Once you gained access to drinkable water and your next objective is to keep it safe, the 1000ml lexan bottle is the perfect item for you. Made with Lexan Resin Polycarbonate Plastic, the lexan bottle is virtually indestructable. It also prevents absorbing flavors and smells, while the lid threads attach directly to MSR or Katadyn water filters for easy filtering. Graduated measures help you measure in both ounces and milliliters.
Used with water purification tablets, the 1000ml lexan bottle provides an easy solution to both obtaining and storing your safe, drinkable water. Does your 72 hour kit have a lexan bottle in it? If not, now is a great time to improve your kit by including one!
Click here for survivalsuperstore.com's product page.
Related articles by Zemanta
- 'Tea Bag' Filter Delivers Purified Water (merid.org)
Tuesday, July 27, 2010
Portable Aqua Tablets - easy solution for water safety
Pin It
Whether you are camping, hiking, traveling, or simply thinking about being prepared; water is a crucial element in life that cannot be gone without for a long period of time. Anywhere from 65% to 90% of the human body is composed of water. We have a perfect line of products to help you meet your water purification needs in camping, hiking, and emergency preparedness.
Portable Aqua Water Purification Technology is an excellent solution for water safety for those looking for easy, compact, and light weight water purification system. Though it is not meant for on-going use, it is a perfect solution when you have to obtain safe, drinkable water without having to start a fire.
Portableaqua.com suggests the following uses:
Portable Aqua Tablets are included in all of our deluxe emergency kits as well as the survivor emergency kits. But if you need the tablets for an addition to your 72 hour kit or for your hiking trip, they are available at www.survivalsuperstore.com. Or click here for a direct link to the product page.
by Store
www.survivalsuperstore.com
www.basicliving.com
Portable Aqua Water Purification Technology is an excellent solution for water safety for those looking for easy, compact, and light weight water purification system. Though it is not meant for on-going use, it is a perfect solution when you have to obtain safe, drinkable water without having to start a fire.
Portableaqua.com suggests the following uses:
Outdoor Activities
Whether camping, canoeing, hunting, or engaging in any sort of outdoor activity, it pays to be mindful of your water supply. A bottle of Potable Aqua® tablets takes up very little space, weigh less than a pound, and when used correctly will protect you from a host of parasites, viruses and bacteria.International Travel
The Center for Disease Control and Prevention (CDC) reports that between 30% and 70% of international travelers suffer some form of Traveler's Diarrhea (TD), calling TD "the most predictable travel-related illness."
The most common causes of water-borne TD are bacteria, such as E. coli, cholera and salmonella, which are reduced or eliminated by Potable Aqua® Drinking Water Germicidal Tablets.
Be conscious of where you are. If you are traveling to a place where indoor plumbing is not widely available, or where monsoons, floods or inadequate water treatment may leave water supplies exposed to pathogens, proceed with caution.
Potable Aqua® Drinking Water Germicidal Tablets, when used correctly, can render water safe for drinking.Disaster Relief and Emergency Preparedness
As hurricanes and tsunamis tragically demonstrate, the first things to get knocked out by natural disasters are the electrical grid and the water supply.
According to the Federal Emergency Management Agency (FEMA) an adult needs a minimum of a half gallon of water per day just for drinking. So a family of four would require roughly two gallons per day of purified water.
When water is scarce, water purification tablets like Potable Aqua® are crucial for an emergency preparedness kit.
Portable Aqua Tablets are included in all of our deluxe emergency kits as well as the survivor emergency kits. But if you need the tablets for an addition to your 72 hour kit or for your hiking trip, they are available at www.survivalsuperstore.com. Or click here for a direct link to the product page.
by Store
www.survivalsuperstore.com
www.basicliving.com
Tuesday, July 20, 2010
Applesauce - the home made way
Pin It
After a few years into marriage I decided that making my own baby food was the best way to go to provide better nutrition for my infants. One of the many things that I decided to do and still do for our whole family is make applesauce. Apples seem to be in abundance where I live and there are so many things you can do with them.
The first few times I made applesauce I peeled and cored every apple and then put them in a pot on the stove to cook down. The applesauce was good but there was too much work involved for me to continue this process so I started looking around for something to help make this process easier. Two products that I found on the market were a steam juicer and food strainer/sauce maker. The steam juicer is an appliance that can be used for many things. Besides being a steam juicer, it is a colander, steam cooker, soup pot and roaster so if you want to get your money’s worth out of it don’t store it too far away because you can use it all year long.
When preparing my applesauce I use the steam juicer first. I wash my apples, stem, and quarter them (which allows the apples to cook faster). I do not take the time to core them because the food strainer/sauce maker will take care of the cores. I fill up the colander in the steamer with the prepared apples. The bottom pan or sauce pot in the juicer must be filled with water. Place the sauce pot on the stove filled with water, the juice kettle on top and then the colander on top of that with the lid in place. Bring that to a boil. You should allow your apples to steam for about 60 minutes or until they are nice and mushy.
While the apples have been steaming, concentrated juice has been collecting in the juice kettle. I drain that juice off, bottle it while it is hot and process it in a boiling water bath for 20 minutes (3,000 to 6,000 ft). Later I use the juice for fruit drinks or boil it with sugar for syrup (great on pancakes or waffles).
After the apples have steamed for 60 minutes and I have bottled all of the juice. I run the apples through a food strainer/sauce maker. This machine is great because it separates the peel, core and seeds from the pulp. The food strainer/sauce maker is nice but not absolutely necessary either. I have in the past just mashed my apples through a sieve. Once the pulp has been extracted though, you need to add some kind of anti-darkening agent. I use Fruit Fresh. I just add the powder right to the applesauce. The next step is to return the applesauce to the sauce pot (the bottom pot of the steamer) and add sugar. I taste my sauce and sweeten it accordingly. You can follow this tip. Add ¼ cup sugar per pound of apples. I have also added red cinnamon candy to my sauce. It gives it a nice pink color, adds some sweetness, and a cinnamon taste. My kids think this applesauce is great.
After you add your sugar heat the sauce to boiling. Stir the sauce to prevent sticking. Maintain temperature at a boil (212°F) while filling jars. Ladle hot sauce into hot jars, leaving ½ inch headspace. Remove air bubbles by crisscrossing a flat plastic utensil through the sauce. Wipe around the top of the bottle. Place hot lid on the bottle and finger tighten the ring. Process your pints or quarts of applesauce for 30 minutes (3,000 to 6,000 ft) in a boiling water bath. After processing time is over remove carefully. Let the jars sit on a towel covered counter for 12 to 24 hours. Then check the seal by pressing the lid in the center. If it gives at all it is not sealed and must be refrigerated. Use your unsealed applesauce within 24 hours.
I know it seems like a lot of work but it is well worth the effort. Homemade applesauce just doesn’t compare to store bought sauce. When you do your own you have a piece of mind that you know what is going into the sauce. It also gives you a sense of pride and satisfaction. I think your kids will love the fact that it is homemade too. So start making sauce and enjoy.
Related articles by Zemanta
- Your Apple-Themed Recipe Could Win You a Trip to New York City Courtesy of Tree Top! (susanheim.blogspot.com)
- The Red Fruit That Melts The Pounds Away (healthmad.com)
Thursday, July 15, 2010
Honey - Sweet Tips and Tricks
Pin It
Honey is one of the few foods low in pesticide contamination. Contaminated bees die before they reach the hive. Most diseases of bees are not transferred to humans. Honey is also free of preservatives, artificial flavors, colors, and will not mold. Bacteria and disease micro-organisms when introduced into honey died within a few hours or days.
Babies younger than a year should not be given honey.
Honey will not freeze, so store it almost anywhere, in a solid container with a tight lid. Be sure to keep honey covered. When left uncovered, honey picks up other odors and loses its own aroma. Honey in storage usually gets darker in color and stronger in flavor, but remains useful as ever. Remember honey that has been diluted with water will ferment.
Always mix honey thoroughly with other recipe ingredients before turning mixture into baking pans. This will prevent a too-moist, over-sweetened layer from collecting on the top. Make it a rule to combine honey with the liquid ingredients to assure complete distribution in the mixture.
When using honey in substitution for sugar in standard recipes, a general rule is to reduce the amount of another liquid ingredient by 1/4 cup for each cup of honey used. Honey can generally replace 1/2 of the required sugar without changing the proportions of the other ingredients in the recipe. Honey absorbs and retains moisture, thus slowing the drying out of baked goods. This is especially important when you want to bake in advance, or save baked goods for any length of time.
Pure honey usually becomes granulated as it ages, or if stored at cold temperatures. Granulation is a natural aging process and does not affect the honey except for color and flavor. Just put honey in a pan of warm water. Make sure the jar of honey is up off direct heat by putting it on a rack or jar lids in the pan of water. Be careful not to overheat granulated honey since too much heat causes the honey to change color and flavor.
Babies younger than a year should not be given honey.
Honey will not freeze, so store it almost anywhere, in a solid container with a tight lid. Be sure to keep honey covered. When left uncovered, honey picks up other odors and loses its own aroma. Honey in storage usually gets darker in color and stronger in flavor, but remains useful as ever. Remember honey that has been diluted with water will ferment.
Always mix honey thoroughly with other recipe ingredients before turning mixture into baking pans. This will prevent a too-moist, over-sweetened layer from collecting on the top. Make it a rule to combine honey with the liquid ingredients to assure complete distribution in the mixture.
When using honey in substitution for sugar in standard recipes, a general rule is to reduce the amount of another liquid ingredient by 1/4 cup for each cup of honey used. Honey can generally replace 1/2 of the required sugar without changing the proportions of the other ingredients in the recipe. Honey absorbs and retains moisture, thus slowing the drying out of baked goods. This is especially important when you want to bake in advance, or save baked goods for any length of time.
Pure honey usually becomes granulated as it ages, or if stored at cold temperatures. Granulation is a natural aging process and does not affect the honey except for color and flavor. Just put honey in a pan of warm water. Make sure the jar of honey is up off direct heat by putting it on a rack or jar lids in the pan of water. Be careful not to overheat granulated honey since too much heat causes the honey to change color and flavor.
Related articles by Zemanta
- Honey instead of sugar (mycookingathome.blogspot.com)
- Medicinal Raw Honey: External and Internal Applications (homeopathy.suite101.com)
- Go Natural: Use Honey (merrymicrofiberblog.com)
- Eating Honey for Your Health (naturalmedicine.suite101.com)
- Honey as an antibiotic: Scientists identify a secret ingredient in honey that kills bacteria (physorg.com)
Wednesday, July 14, 2010
Making Pie Crust Using a Bosch Universal Plus Kitchen Machine
Pin It
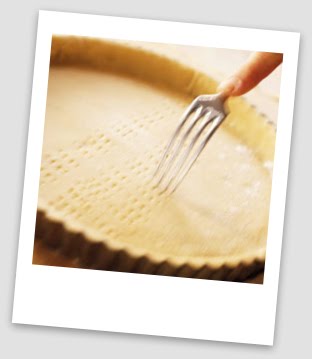
I found a demonstration on youtube.com which talked about how to make pie crusts using a Bosch Universal Plus Kitchen Machine. She did a great job explaining the features and what items to use while making the pie crust. I tried her method using my recipe and it worked out great! Using the Bosch makes it easy as there is no hand work required in cutting up the fat.
Here is the recipe I used:
by Mechele Eckman
www.basicliving.com
www.survivalsuperstore.com
I found a demonstration on youtube.com which talked about how to make pie crusts using a Bosch Universal Plus Kitchen Machine. She did a great job explaining the features and what items to use while making the pie crust. I tried her method using my recipe and it worked out great! Using the Bosch makes it easy as there is no hand work required in cutting up the fat. Here is the recipe I used:
3 cups of flour
1 tsp. baking powder
1 tsp. salt
1/2 cup of lard
1/2 cup of butter
1/3 cup of water
1 egg
2 Tbsp. vinegar
by Mechele Eckman
www.basicliving.com
www.survivalsuperstore.com
Related articles by Zemanta
- Recipe: Twice-Baked Sour Cherry Pie (nytimes.com)
- Recipe: Blueberry-Peach Custard Pie (seattletimes.nwsource.com)
Subscribe to:
Posts (Atom)