Search This Blog

Showing posts with label Cooking. Show all posts

Tuesday, December 18, 2012

Microwave Peanut Brittle

Pin It
     Thanks to a little bit of snow on Sunday, it's starting to feel a bit more Christmasy around here in Rexburg, Idaho.  Most of the students from the college went home last week for Christmas break and things seem much more quiet especially on and around campus.
   
     However, despite the fact that nearly half the population of the city returned to their families throughout the country, things have been very busy and exciting here at Basic Living.  So many have come in to pick up food storage, emergency kits, Bosch Universals and other things for their loved ones this Christmas season.  We are glad to see more people taking an interest in emergency preparedness and are thrilled to be able to help.  We are grateful for all who come by the store or our online store.  And together with our gratitude, we also wish you a very Merry Christmas!

This week we are giving out Peanut Brittles at the store.  It's a very simple recipe (very delicious, too!) and we hope that those who can't make it to the store would try this in their homes.  Enjoy!


Image of Peanuts
Image by Grant Cochrane
Microwave Peanut Brittle

  • 1 1/2 cup     Dry roasted peanuts
  • 1/2    cup     Light corn syrup
  • 1       Tbsp.  Butter
  • 1       Tbsp.  Baking Soda
  • 1       cup     White sugar
  • 1       pinch  Salt (Optional)
  • 1       tsp.     Vanilla
Grease a baking sheet, and set aside.  In a glass bowl, combine peanuts, sugar, corn syrup, and salt.  Cook in microwave for 6 to 7 minutes on high (700 Watts).  Mixture should be bubbly and peanuts browned.  Stir in butter and vanilla.  Cook 2 to 3 minutes longer.

Quickly stir in baking soda, just until mixture is foamy.  Pour immediately onto greased baking sheet.  Let cool 15 minutes, or until set.  Break into pieces, and store in an airtight container.  

Have a more powerful microwave?  Convert cook times here

Wednesday, October 24, 2012

Product Review: Mountain Meal Mess Kit with Folding Stove by Emergency Zone

Pin It
Not too long ago we had an opportunity to go outdoors and roast marshmallows with some friends.  As one of the many Basic Living enthusiasts, I took the opportunity to take some of our products out to see how effective they are (or how effective they are not).  Here are the products I decided to take with me and tested in real outdoor situation and my thoughts on them.


Wednesday, September 28, 2011

No-Cook Cranberry Salsa

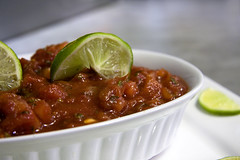
Pin It SalsaImage by ayngelina via FlickrHere is a wonderful cranberry salsa recipe by Kris Mayberry.


Makes 6 cups; Total time 15 minutes
1 Navel Orange, quartered
1 12 oz. bag fresh cranberries
1 1/2 cups fresh pineapple, diced
1 1/2 cups Granny Smith apple, diced
1 cup Jicama, peeled, diced
1 cup pecans chopped and toasted
3/4 cup sugar
Pinch of salt

Wednesday, October 6, 2010

Getting Ready for Halloween!!!

Pin It
It's October!  Halloween is coming!  It's time for costumes, candy, and decorating!!!  Oh, and don't forget the pumpkin carving either.  It is a great way to spend quality time with your family and to nurture your creativity.  Here at Basic Living, we gathered 15 yummy recipes for you to try this Halloween season.  Be sure to start trying them early, so you can use your favorite ones to make your Halloween even yummier!

Tuesday, October 5, 2010

What's for dinner tonight?

Pin It
Isn't trying to decide what's for dinner one of the hardest things sometimes?  It seems like I repeat the same recipes every two weeks.  In an attempt to get inspiration on what to make for dinner, I used to spend hours watching the cooking channel.  Over time, I began to enjoy cooking for my wife and to take chances with new things.  Well, today was one of those days where I had to improvise and adapt to the world around me.  I usually make this dish with cream of mushroom soup, but when I was half way done the reality struck me like a bolt of lightening "we're out of cream of mushroom!"  Here is the accidental recipe which turned out to be a home-run!

Saturday, October 2, 2010

Survival Food!!?

Pin It
So, it's not really considered a "survival food" where we live, but for some it might serve as a survival food when there is nothing left to eat.  Although I grew up in a culture where bee larvae are considered a delicacy, I probably wouldn't be able to get myself to enjoy one of these unless it was the only thing available and I haven't eaten anything for days...  Just in case you are curious, here is the recipe for those who are brave enough to try some.

Wednesday, September 22, 2010

The Best Outdoor Cooking Set!

Pin It
Camping is a great way to spend quality time with your family and friends.  However, because of all the preparation involved, some may choose not to deal with the trouble of acquiring a tent, sleeping bags, and everything else that makes a camping experience so fun and unique.  If you are one of those people, here is a set for you!  Kitchen to Go kit contains everything you need for you and your family have a good meal out in the wild.  It includes a compact gas stove with spare gas cans, frying pan, a small pot, lighter, cooking utensils, a Wind N' Go flashlight, and a Wind N' Go Mini Lantern.
Have you ever been unable to cook in your house because the power went out and your electric stoves won't work?  I have been in those situations many times.  Fortunately, the power outages occurred late at night, so there was no need for us to cook at the time, but in our home we now have portable gas stoves so that we do not find ourselves unable to cook a hot meal for our kids just because the power went out.  Emergency survival is more than just making it through disasters, but it is "how" you survive them.  If you are prepared, there will be no worries.  If you have electric stoves, the Kitchen to Go Kit is a kit for you!!!  Check it out at survivalsuperstore.com today!

by Kento Fukuyasu

 www.basicliving.com
www.survivalsuperstore.com

Enhanced by Zemanta

Monday, August 9, 2010

Rasberry Pie Recipe

Pin It
     Raspberries are filled with bright color and flavor that will wake up your senses and make your taste buds happy.  While picking fresh raspberries from your garden, you might wonder about a way to enjoy the wonderful smell and flavor of these wonderful raspberries long after they were picked.  I have successfully trapped the mouth-watering flavor and heavenly smell of raspberries into a pie.  Here is the recipe.  I hope you'll like it.

4 cups of Raspberries
1/4 c. Clear Jel (instant)
1 to 1/4 c. sugar
     Combine clear jel with the sugar and then add to the raspberries. If they are fresh you may need to add about 1/2 cup water. If your raspberries have been frozen and are thawed do not add any liquid. Pour into a 9 inch pie crust and top with another crust for the top and bake at 425 degrees for 50-55 minutes.


by Mechele Eckman
Enhanced by Zemanta

Friday, July 30, 2010

No-Knead Sourdough Bread

Pin It
1 ½ lb. loaf
3 cups all-purpose flour, more for dusting
¼ tsp. instant yeast
1 tsp. salt
1 tsp. sugar
1 c. sourdough
Cornmeal as needed


     1. In a large bowl combine flour, yeast and salt. Add 1 5/5 cups warm water, and stir until blended; dough will be shaggy and sticky. Cover bowl with plastic wrap. Let dough rest for 18 to 24 hours at warm room temperature, about 70 ° F. You can put it into the oven with the oven light on.

     2. Dough is ready when its surface is dotted with bubbles. Lightly flour a work surface and place dough on it; sprinkle it with a little more flour and fold it over on itself once or twice. Cover loosely with plastic wrap and let rest about 15 minutes.

     3. Using just enough flour to keep dough from sticking to work surface or to your fingers gently and quickly shape dough into a ball. Generously coat a cotton towel with flour, wheat bran, or cornmeal; put dough seam side down on towel and dust with more flour, bran or cornmeal. Cover with another cotton towel and let rise for about 2 hours. When it is ready, dough will be more than double in size and will not readily spring back when poked with a finger.

     4. At least a half-hour before dough is ready, heat oven to 450° F. Put a 6 to 8 quart heavy covered pot (cast iron, enamel, Pyrex or ceramic) in oven as it heats. When dough is ready, carefully remove pot from oven.  Slide your hand under towel and turn dough over into pot, seam side up; it may look like a mess, but that is ok. Shake pan once or twice if dough unevenly distributed; it will straighten out as it bakes. Cover with lid and bake for 30 minutes, then remove lid and bake another 15 to 30 minutes, until loaf is beautifully browned. Cool on a rack.

by Mechele Eckman
www.basicliving.com
www.survivalsuperstore.com
Enhanced by Zemanta

Thursday, July 22, 2010

Find us at the Rexburg Farmers' Market

Pin It
It's summer time!  That means it's time for Rexburg's annual farmers market.  It is a great place to find fresh produce and hand-made crafts and more!  This year, we are also going to be part of the farmers market by selling our home made beef jerky made with our dehydrators and a Bosch Universal Kitchen Machine.  We are seeing continual success with our jerky.  Last Friday, we sold out of three flavors: Mama Mia Italiano, Bacon and Cheddar, and Hot, HOT Salsa. 


We also held a jerky eating contest.  Our contestants were required to chew and swallow ten pieces of jerky with various flavors.  Spicy ones included!

Jerky can be made at home very easily with the use of a jerky seasoning mix and a dehydrator.  Check out our store for tools to help you get started on your jerky making project. 


We have a winner! 

If you live in Rexburg, or anywhere near the area, the Rexburg Farmers Market is the place to be on Friday evenings.  If you are in the area between 4 p.m. to 8 p.m. stop by and try our jerky for free!  Come and talk to Jim about making your own home made jerky and what tools we have for you at the store.  Hope to see you there tomorrow!
Enhanced by Zemanta

Tuesday, July 20, 2010

Applesauce - the home made way

Pin It

After a few years into marriage I decided that making my own baby food was the best way to go to provide better nutrition for my infants.  One of the many things that I decided to do and still do for our whole family is make applesauce.  Apples seem to be in abundance where I live and there are so many things you can do with them.
The first few times I made applesauce I peeled and cored every apple and then put them in a pot on the stove to cook down.  The applesauce was good but there was too much work involved for me to continue this process so I started looking around for something to help make this process easier. Two products that I found on the market were a steam juicer and food strainer/sauce makerThe steam juicer is an appliance that can be used for many things.  Besides being a steam juicer, it is a colander, steam cooker, soup pot and roaster so if you want to get your money’s worth out of it don’t store it too far away because you can use it all year long.
When preparing my applesauce I use the steam juicer first.  I wash my apples, stem, and quarter them (which allows the apples to cook faster).  I do not take the time to core them because the food strainer/sauce maker will take care of the cores.  I fill up the colander in the steamer with the prepared apples.   The bottom pan or sauce pot in the juicer must be filled with water.  Place the sauce pot on the stove filled with water, the juice kettle on top and then the colander on top of that with the lid in place.  Bring that to a boil. You should allow your apples to steam for about 60 minutes or until they are nice and mushy.
While the apples have been steaming, concentrated juice has been collecting in the juice kettle.  I drain that juice off, bottle it while it is hot and process it in a boiling water bath for 20 minutes (3,000 to 6,000 ft).  Later I use the juice for fruit drinks or boil it with sugar for syrup (great on pancakes or waffles). 
After the apples have steamed for 60 minutes and I have bottled all of the juice.  I run the apples through a food strainer/sauce maker.  This machine is great because it separates the peel, core and seeds from the pulp.  The food strainer/sauce maker is nice but not absolutely necessary either.  I have in the past just mashed my apples through a sieve.  Once the pulp has been extracted though, you need to add some kind of anti-darkening agent.  I use Fruit Fresh.   I just add the powder right to the applesauce.  The next step is to return the applesauce to the sauce pot (the bottom pot of the steamer) and add sugar.   I taste my sauce and sweeten it accordingly.  You can follow this tip. Add ¼ cup sugar per pound of apples.  I have also added red cinnamon candy to my sauce.  It gives it a nice pink color, adds some sweetness, and a cinnamon taste.  My kids think this applesauce is great.
  After you add your sugar heat the sauce to boiling.  Stir the sauce to prevent sticking.  Maintain temperature at a boil (212°F) while filling jars.  Ladle hot sauce into hot jars, leaving ½ inch headspace.  Remove air bubbles by crisscrossing a flat plastic utensil through the sauce.  Wipe around the top of the bottle. Place hot lid on the bottle and finger tighten the ring.    Process your pints or quarts of applesauce for 30 minutes (3,000 to 6,000 ft) in a boiling water bath.  After processing time is over remove carefully.  Let the jars sit on a towel covered counter for 12 to 24 hours.  Then check the seal by pressing the lid in the center.  If it gives at all it is not sealed and must be refrigerated.  Use your unsealed applesauce within 24 hours.
I know it seems like a lot of work but it is well worth the effort.  Homemade applesauce just doesn’t compare to store bought sauce.  When you do your own you have a piece of mind that you know what is going into the sauce.  It also gives you a sense of pride and satisfaction. I think your kids will love the fact that it is homemade too. So start making sauce and enjoy. 

Enhanced by Zemanta

Saturday, July 17, 2010

Victorio Stainless Steel Steam Juicer

Pin It
Extract the natural juice of grapes, berries, and other high-liquid fruits with the power of steam. Just boil water in the bottom container and place fruit in the top container. Natural concentrated fruit juice drips in the center pan where it can be extracted through a surgical-quality, heat-resistant tube. Use it for making jellies or store as concentrate for healthy natural fruit juice. The Steam Juicer is also perfect for cooking soups and stews or steaming vegetables.
Steam Juicer Capacities:
  • Over all height is 16"
  • Diameter is 10.5"
  • Colander - The part the fruit or vegetables go in - 9.5 QT
  • Juice Kettle - The part that catches the juice during the steam juicing process - 2.5 qt
  • Water pan - bottom pan of water that boils to create steam - 4.5 QT
Available at Basic Living
    Enhanced by Zemanta

    Rice Recipes

    Pin It
         Regular white rice has been milled to remove the hull, germ and most of the bran. It is available both long and short grain, the long grain being a better all-purpose rice. One cup uncooked= 3 cups cooked.

         Parboiled (converted) rice contains the vitamins found in brown rice but is polished like white rice. One cup uncooked=3 1/2 cups cooked. Precooked (instant) rice is commercially cooked, rinsed and dried before packaging. It is therefore quick and very easy to prepare. One cup uncooked=2 cups cooked.

         Brown rice is unpolished with only the outer hull removed. It has a slightly firm texture and a nutlike flavor. One cup uncooked=4 cups cooked.

         Wild rice is the seed of grass that grows in marshes. It is dark greenish-brown in color and has a distinctive, nutlike flavor. Expensive, it is sometimes combined with white or brown rice. One cup uncooked=3 cups cooked.

    RICE RECIPES

    Plain Rice
    2 C. rice
    4 C. water
    1/2 tsp. salt (optional)
         Put rice in saucepan large enough to allow for two times expansion. Cover with water to about 2 inches above rice, add salt if desired. Bring to a boil and boil uncovered until most of the water is gone. Turn down heat as low as possible; cover and steam about 20 mins or until water has been absorbed.

    Ordinary Brown Rice
    1 C. brown rice
    2 3/4 C. water
    1 tsp. salt, if desired
         Heat until boiling stirring once; reduce heat.  Cover and simmer until tender, 45-50 minutes; remove
    from heat.

    Lemon Rice
         Stir in 2 TBSP margarine, melted, and 2 TBSP lemon juice into cooked rice.

    Mushroom Rice
         Heat 1 can mushrooms, drained in 2 TBS margarine until tender; stir into cooked rice.

    Onion Rice
         Cook 2 TBSP finely chopped onion in 2 TBSP margarine until tender; stir into cooked rice.

    Parsley Rice
         Stir 2 TBSP fresh parsley into cooked rice.

    Deluxe Brown Rice
    1 C. sliced carrots
    3 TBSP oil
    1/2 C. onions
    3 C. cooked brown rice
    1 tsp. salt, or to taste
    1 TBSP sesame seeds
         Saute’ carrots in oil about 10 minutes.  Add onions. Cook 10 minutes longer. Stir in rice and salt. Cook, stirring gently until rice is heated through. Add sesame seeds; toss lightly.

    Risotto
    4 TBSP butter
    1 C. rice
    2 C. basic beef or chicken stock
         Melt butter in heavy skillet. Add rice; cook over medium heat, stirring constantly, until butter is absorbed. Pour in 1 cup stock; cook, stirring frequently, until stock has been absorbed. Add 1/2 cup stock; cook until absorbed. Add remaining stock; stir well. Cover; simmer until stock has been absorbed, stirring occasionally. Cooking time will be about 25 minutes after first addition of stock. (From the book The Encyclopedia of Creative Cooking).

    Basic Fried Oven-Cooked Rice
    4 TBSP butter
    1 C. rice
    1 small onion, chopped
    2 C. basic Chicken Stock
         Melt butter in frying pan. Add rice and onion; cook over medium heat about 5 minutes or until golden, stirring frequently. Turn rice mixture into casserole dish. Stir in stock; cover. Bake in preheated 425 degree oven for 25 minutes, or until rice is tender and stock is absorbed. (From The Encyclopedia of Creative Cooking).

    Curried Rice
    1/2 C. rice
    2 C. hot water
    1/2 C. canned tomatoes
    1/4 C. finely sliced onion
    1/4 C. thinly sliced green pepper
    2 TBSP melted butter
    3/4 tsp. curry powder
         Put rice into casserole dish; add water. Let stand about 3/4 hour. Add all other ingredients; mix well. Cover; cook in preheated 350 degrees oven about 1 1/2 hours, stirring occasionally. Most of liquid should be absorbed, but serve rice while still moist. Yield 4 servings. (From The Encyclopedia of Creative Cooking).

    Sugar-and-Spice Rice
    1 C. cold water
    1 C. whole milk
    1 tsp. salt
    1 C. uncooked rice
    1/2 C. Butter
    1/2 C. granulated sugar
    2 tsp. cinnamon
         Combine water, milk, salt, and uncooked rice in 3-quart saucepan; bring to boil. Stir once; cover.  Turn heat very low; cook 20 minutes or until water and milk are absorbed. Do not uncover while cooking.  Spoon rice into serving dishes; top each serving with 2 TBSP butter, 2 TBSP sugar, and 1/2 tsp cinnamon.  Serve immediately. Yield 4 servings.

         Unless otherwise noted the information and recipes on rice were taken from the Betty Crocker’s Cookbook.
    Enhanced by Zemanta

    Thursday, July 15, 2010

    Presto 23 Qt Pressure Cooker/Canner

    Pin It Let the canning begin!!!

    Pressure canning, the only method recommended safe by the U.S.D.A. for canning low-acid foods, allows you to preserve meats, vegetables, and fruits. Presto pressure canners feature an easy-to-read dial gauge for accurate pressure control and extra strong, warp-resistant aluminum construction. The air vent/cover lock allows pressure to build only when the cover is closed properly and prevents the cover from opening until pressure is safely reduced. Includes cooking/canning rack and complete instruction/recipe book. 22-Quart Liquid Capacity (20.9 Liters).

    Find your steam pressure canner at Basic Living!

    Also, check out our article on Steam Pressure Canning!

    Enhanced by Zemanta

    Wednesday, July 14, 2010

    Making Pie Crust Using a Bosch Universal Plus Kitchen Machine

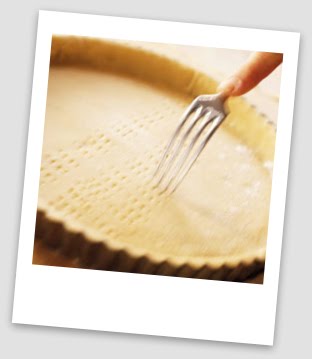
    Pin It I found a demonstration on youtube.com which talked about how to make pie crusts using a Bosch Universal Plus Kitchen Machine.  She did a great job explaining the features and what items to use while making the pie crust.  I tried her method using my recipe and it worked out great!  Using the Bosch makes it easy as there is no hand work required in cutting up the fat. 

    Here is the recipe I used:

    3 cups of flour
    1 tsp. salt
    1/2 cup of lard
    1/2 cup of butter
    1/3 cup of water
    1 egg
    2 Tbsp. vinegar

    by Mechele Eckman

    www.basicliving.com
    www.survivalsuperstore.com


    Enhanced by Zemanta