Search This Blog

Showing posts with label disaster preparedness. Show all posts

Friday, January 11, 2013

Make Your Own Solar Oven (Guest Post)

Pin It Today, we welcome an exciting guest author, Agnes Jimenez.  Agnes is a professional blogger and writer who has written much on the subject of preparedness, food, and frugal living.  Her blog is a very popular blog filled with helpful information and advice.  We are very fortunate to have her provide some information on making your own solar oven today. 

If you have never considered how you will cook during an electrical outage or during an emergency, consider the benefits of making your own solar cooker. Of course, you can purchase a pre-built solar cooker, but why do that when you can make your own with common materials you probably already have on hand? A solar cooker can even come in handy when you want to keep the heat out of the kitchen and enjoy a hot meal.

For a simple, lightweight solar cooker you will need the following:

Image by "suphakit73"
• 2 cardboard boxes (two sizes that can nest) * 
• Shredded newspaper
• Black construction paper
• 4 pieces of cardboard
• Heavy duty aluminum foil
• Rubber cement
• Staples
• Heavy duty thread
• Tempered glass (optional)

*When selecting your cardboard boxes, be sure that the smaller box is large enough to accommodate any cooking vessel or pan that you will be using in your solar oven. The larger box should be approximately 1" to 2" larger in width and length. This will allow for a ½" to 1" gap on all sides. Additionally the smaller box should be the same height or ½" shorter than the larger box.


 Step #1

image by "mrpuen"
Cut the flaps off both boxes. Line the inside of the smaller box with black construction paper in order to help retain heat.

Step #2

Place the smaller box inside the larger one and fill gaps between the two boxes with shredded newspaper.

Step #3

Make flared reflectors by taking the 4 pieces of cardboard and cutting them at an angle. The bottom edge should be the same width as the side of the box where it will be attached; the top of each piece should be several inches wider than its base. Cover each reflector with heavy-duty aluminum foil; use rubber cement to attach the foil to the cardboard and make sure that the foil is not wrinkled or folded. Smooth it flat.

image by "TeddyBear[Picnic]"

Step #4

Staple each reflector to the outside edge of the solar cooker. Punch a small hole in each upper corner on all 4 of the reflectors. Use the heavy duty thread in tying adjacent corners together leaving the reflectors at a slight outward angle in order to reflect the sun.


Step #5

If you are using a tempered glass, have it cut to fit the inside dimension of your solar cooker and place it on top of the cooker. You are now ready to begin using your solar oven for baking bread, muffins, casseroles, and just about anything you can imagine.


References:


About the Guest Author
Agnes Jimenez is a professional blogger and writer. She writes for many online establishments and supports those ones that offer practical lifestyles to consumers.  As a frugal living and emergency preparedness advocate, she recommends FoodInsurance.com for families who are looking for high quality food storage and emergency kit supplies.  You may connect with Food Insurance in Facebook.

Friday, September 21, 2012

Managing Our Fear In Disasters

Pin It
 What do you fear most?  Is it being home alone at night?  Is it a big hairy bug?  Or is it the footsteps behind you while you're walking home at night?  Big or small, we all have dealt with fear in our lives.  For me, ever since I woke up one morning with a big centipede crawling on my face, the thought of those things lurking around in my bedroom has caused many sleepless nights.  During the last two years, my wife and I lived in Japan with my family and we had our fair share of centipede encounters (I'll merely say without exaggerating we killed nearly one hundred centipedes in the last two years and most of them were in our house!).  Thanks to these encounters, I learned a little bit about fear, how it works, and what we can do to manage them.

Before going into fear, you should know a few things about centipedes.  Centipedes are very aggressive meat eating bugs that come out at night to hunt for their food.  The ones we saw ranged from 2 to 6 inches long (I hope you can understand how difficult it is for me to write about this).  They love dark and damp areas with access to other bugs for food.  They usually have about 30 to 46 legs and have a pair of very sharp and venomous fangs.  Its poison is known to attack the lymph nodes and cause extreme pain and sometimes shock.   I will not post a picture here but you can certainly look it up if you're curious.  Now that you know, we can proceed to our main topic, fear.

Fear is a part of life
If you ponder your life's experiences most of us will quickly realize that fear has always been a large part of our lives.  Sometimes, it serves as a way to protect us from harm's way. 

Wednesday, June 30, 2010

Tips For Surviving A Flood

Pin It Tips for surviving a flood from the residents of North Dakota. 

Tuesday, June 29, 2010

Safe Water

Pin It
Organisms
1. Protazoa--like cryptosporidia and giardia are the largest of the organisms and easiest to remove with simple filtration.
2. Bacteria--like salmonella and cholera are smaller and harder to remove.
3. Viruses--like hepatitis are the smallest and hardest to remove. They are not removed by filters alone.

Methods of Purification
1. Boiling:
Most water can be purified for drinking purposes by boiling it for 5 to 10 minutes, this will destroy the germs. If desired, to improve the taste of the water after boiling, simply pour the boiled water, after
it has been cooled, from one container to another several times.

2. Chlorination:
It may not be possible to boil your drinking water because of gas or electric power failure or damage
to your stove. Open flames should be avoided in the first few hours after an enemy attack or natural
disaster (such as an earthquake), because of the danger from gas or fuel-oil leaks in your home or
neighborhood. Under these conditions, it would be better to chlorinate your drinking water instead of
boiling it. Household bleach solution available in grocery stores that contains hypochlorite, a chlorine
compound, may be used for this purpose. 

8 drops bleach per gallon of water, 1/2 tsp. per 5 gallons of water, 2 TBSP per 50 gallons of water.
(Double the quantity if the water is cloudy). Mix or shake thoroughly. This is easily done by adding the
bleach when the container is only about half full.  The taste or smell of chlorine (after treated water stands for 30 minutes) is a sign of safety. Let the chlorinated water sit for 24 hours before drinking.

3. Purification tablets:
Use tablets in accordance with instructions on the package. Usually one tablet is sufficient for 1 quart
of water; the dosage is doubled with cloudy water.

4. Iodine:
Ordinary household iodine may be used to purify small quantities of water. Add 2 or 3 drops of tincture of iodine or iodine solution to each quart of clear water and 8 to 10 drops of iodine to each quart of cloudy water. Mix and allow to stand for 30 minutes.

5. Sterilized water:
Sterilized water may also be stored. To sterilize, boil water one to three minutes and pour into hot, sterilized jars with sterilized lids, or process bottles of water in a water bath (like you were canning fruit)-twenty minutes for a quart jar and twenty-five minutes for a two-quart jar.


Care and Use of Water Supplies
In addition to water stored in containers, there is usually other water available in most homes that is
drinkable, such as: Water and other liquids normally found in the kitchen, including ice cubes, milk, soft drinks, and fruit and vegetable juices.

Water in the hot water heater. (20 to 60 gallons).  Water heaters should be drained periodically to
release any accumulated sediment so that the full capacity of the container is readily usable. Water in the flush tanks (not the bowls) of home
toilets.

In the home, occupants should drink first the water they know is uncontaminated, such as that mentioned above. If necessary, “suspicious” water, such as cloudy water from regular faucets or perhaps some muddy water from a nearby stream or pond can be used after it has been purified. This is how to purify it:

1. Strain the water through a paper towel or several thicknesses of a clean cloth, to remove dirt, if any. Or else let the water settle in a container for 24 hours by which time any solid particles would have sunk to the bottom. A handful of clay soil in each gallon water would help this settling process.

2. Next, boil the water for 10 minutes or add chlorine
according to the previous directions.

Tuesday, June 8, 2010

Preparation before an earthquake strikes

Pin It
Have you ever been in an earthquake?  If the answer is yes, then you have a pretty good idea of the truthfulness of a Japanese proverb.  "A disaster comes when it is forgotten."  It means that disasters strike when you least expect them.  Earthquakes are notorious for its uninvited, unexpected, and destructive visits.  There are no warnings beforehand.  No phone calls, no e-mails, no text message to tell you it is coming.  What can you do to prepare for this "uninvited guest"?

Before an earthquake
Federal Emergency Management Agency recommends that you take the following 6 steps for earthquake preparation well before an earthquake strikes.
  1. Check for hazards in the home
  2. Identify safe places indoors and outdoors
  3. Educate yourself and family members
  4. Have disaster supplies on hand
  5. Develop an emergency communication plan
  6. Help your community get ready
Check for hazards in the home
The key is to take a good look around your house and think about what would happen if an earthquake strikes.  Are there tall bookcases or shelves?  You can increase your chance of earthquake survival by simply fastening the shelves to the wall and storing heavy items on the bottom of the shelf and lighter items towards the top.  Dishes and other glass items should be stored in cabinets with doors that would not pop open in an earthquake.  Remember to check for loose electrical wires and gas lines.  One of the most common secondary disaster in an earthquake is fire caused by broken gas lines and loose electrical wires.

Identify safe places indoors and outdoors
Sturdy tables and desks are great places to take cover while the quake continues.  It is good to stay away from windows and other glass items that could break.  When you are outdoors, stay outdoors.  Keep away from buildings, telephone poles, highway overpass, and any other things that may come down at you.

Educate yourself and your family members
Learn about earthquakes.  Take time to teach your family when and how to shut the gas, electricity, and water off.  Much damage could be prevented by simply shutting off the gas.

Have disaster supplies on hand


Tools to help you shut off gas and water is an important item that must be included in your earthquake preparedness kit.


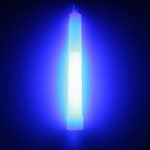
In an environment where gas may be leaking, it is important to have a safe source of light.  Lighting a match in an earthquake could cause more damage than the benefit intended to provide.  A simple light stick is an inexpensive, safe way to provide light in an earthquake.  Flashlights are also acceptable combined with extra batteries and bulbs.  It is even better to have self-charging flashlights to prevent battery power outage. 


Develop an emergency communication plan
It is highly likely for family members to become separated in an earthquake if it occurs during the day. FEMA recommends that you make a plan as a family to get reunited.  It is also a good idea to have an emergency contact out of state.  Ask a friend or a relative to be your contact for emergencies.


Help your community get ready
Surviving a disaster is a community effort.  Get in touch with local emergency services as well as representatives from your local gas companies and learn about what you should do in an emergency.

The important thing to remember when preparing for earthquakes is to prepare for secondary disasters.  Fire is a very common problem that occurs after an earthquake due to broken gas lines and loose electrical connections.  Stay tuned for more on earthquake preparedness.  Next time, we will discuss about what we should do during an earthquake.

Thursday, June 3, 2010

Hurricane season begins on June 1

Pin It

Tuesday, June 1 marked the start of the 2010 Atlantic hurricane season. It will continue until the end of November to help the people be prepared for hurricanes.  According to the Federal Emergency Management Agency, officials spent a day on Tuesday urging the citizens to prepare for hurricanes as well as other disasters.

According to fema.gov, FEMA Administrator Craig Fugate discussed the importance for all to be prepared.  "June 1 should serve as an important reminder about the need for individuals to be prepared for any emergency," said Administrator Fugate. "This may be the start of the hurricane season, but emergencies can happen anytime, anywhere, and everyone needs to be prepared - not just those folks in hurricane prone states."

 As for the hurricane season this year, National Oceanic and Atmospheric Administration (NOAA) is predicting the year 2010 to be a very active hurricane season.  The following information is found on NOAA's 2010 Atlantic Hurricane Season Outlook .  


The conditions expected this year have historically produced some very active Atlantic hurricane seasons. The 2010 hurricane season could see activity comparable to a number of extremely active seasons since 1995. If the 2010 activity reaches the upper end of our predicted ranges, it will be one of the most active seasons on record.

We estimate a 70% probability for each of the following ranges of activity this season:

  • 14-23 Named Storms,
  • 8-14 Hurricanes
  • 3-7 Major Hurricanes
  • An ACE range of 155%-270% of the median.

The seasonal activity is expected to fall within these ranges in 7 out of 10 seasons with similar climate conditions and uncertainties to those expected this year. They do not represent the total possible ranges of activity seen in past similar years.
 Whether you live in a hurricane prone area or not, it is important to keep emergency preparedness in mind to protect yourself and your loved ones from the unexpected.  For more hurricane information, you can check out the NOAA website.  For 72 hour kits and emergency preparedness items check out our helpful resources at survivalsuperstore.com


Wednesday, June 2, 2010

How to assemble a 72 hour kit

Pin It
In an emergency, whether it be natural disaster or man made, it is more than a good idea to have a 72 hour kit.  You and your family's lives may depend on your level of preparedness.  Here are some areas you should consider while assembling your 72 hour kit. 

Container - Everything should be stored in one place in a container that is easy for you to grab.   Consider using items like a backpack, a bucket, a carry-on luggage, or a plastic tote.

Light - Include some kind of source of light such as flashlights, candles, lanterns, and light sticks.  It is a good idea to get a self-charging flashlight to eliminate the risk of running out of power.

Food and Water - Include food and water with long shelf life.  It is also good to have items that will help you obtain drinkable water (water purification tablets, portable stove, stainless cups, etc.)  Be sure to check the expiration dates periodically to keep them up to date. 

Weather Protection - Whether the climate is hot or cold, you must have items that will help you protect yourself from the elements.  Include items like portable tents, emergency blankets, ponchos, a change of clothes, shoes, waterproof matches, kindling, etc.     
                                    
Communication  - A simple radio can help you obtain information necessary to protect you and your family from potential harm.  If the radio requires batteries keep in mind to include extra batteries.  There are also radios that are rechargeable that would eliminate the risk of running out of power. 

First Aid and Medical Needs - A first aid kit is a must-have for all 72 hour kits, however, it is also important to include your personal prescription medication if you have any.  If you require glasses, don't forget to include a pair of glasses as well.

Cash in small bills - When the power goes out, it may be impossible to buy things using credit cards.  Keep some cash in your 72 hour kit in small bills as well as some change.  

Sanitation and Personal Hygiene - Being able to meet your sanitation and hygiene needs in an emergency is not only a good idea, but it also helps you relieve the stress that always come with an emergency.  Tooth brush, tooth paste, hand sanitizer, deodorant and other items are some of the items to be included in your 72 hour kit.  

Other tools - It is also good to include some tools to help you survive an emergency.  Among them are items like ropes, multi-function knife, duct tape, pry bar, and cell-phone chargers.   


Tuesday, April 20, 2010

Preparing Your Children for Emergencies/Disasters

Pin It Disasters and emergencies can be very stressful for both the parents and the children, which can leave a lasting impact on a person's life. Surviving an emergency or a natural disaster sometimes has more to do with meeting your emotional and psychological needs than just meeting your physical needs. How do you prepare to meet your needs in emergency situations? Having something that will help you take your mind off of the surrounding circumstances. A deck of cards can be a compact and simple way to help you prepare for difficult situations, but what about little children? What can you have in your emergency kit that will help the little ones stay busy and entertained? Emergency Zone's Children's Emergency Kit comes with an activity pack for kids. It contains items like coloring books, crayons, teddy bear, note pad and a pencil. Remember, surviving an emergency is not just meeting your physical needs, but also your emotional and psychological needs. When putting your 72 hour kits together, keep in mind your children and what you can do to help them make it through difficult times.
Enhanced by Zemanta